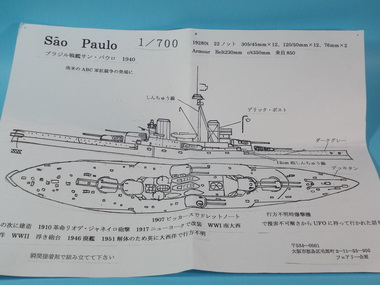
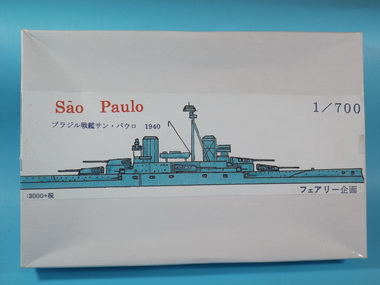
SÃO PAULO
FAIRY KIKAKU - 1:700
Año de construcción / Year of build: 2018
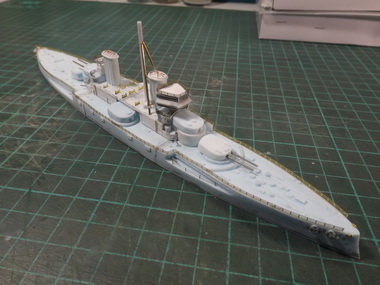
Aquí comienzo con un nuevo proyecto, se trata del acorazado que prestara servicio en la Armada Brasileña junto a su gemelo, el Minas Gerais. El kit, regalo de un colega, es de resina y si bien resulta una pieza atractiva por su rareza, demanda mucho trabajo extra. No obstante ello he decidido construirlo por sus características particulares y a fin de retribuir el generoso gesto del modelista que me lo obsequió.
Here I start with a new project, it's the battleship that served in the Brazilian Navy together with the Minas Gerais, a vessel of the same class. The resin kit, a colleague's gift, is an attractive piece because of its rarity, but it demands a lot of extra work. However, I decided to build it due to of its particular characteristics and in order to reward the generous gesture of the modeler who gave it to me.

Construcción
Building
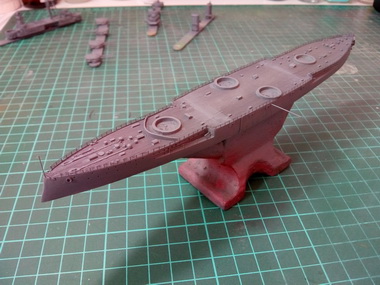
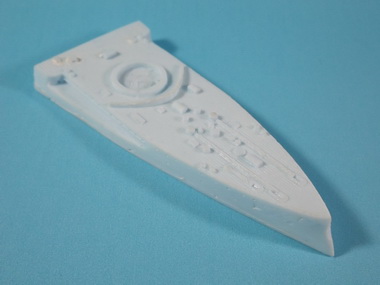
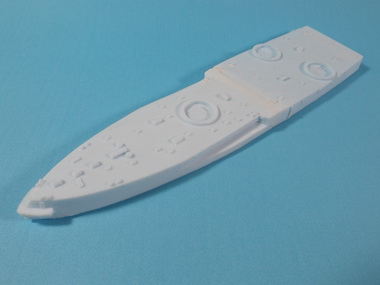
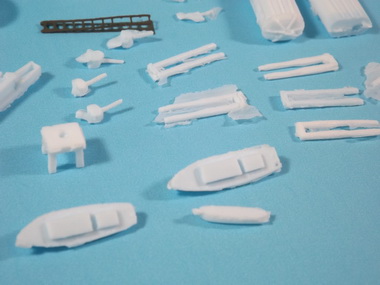
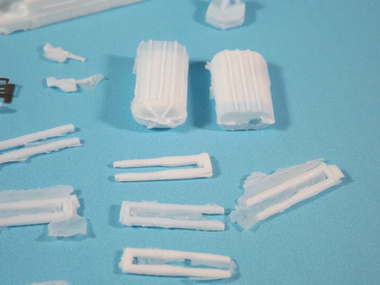
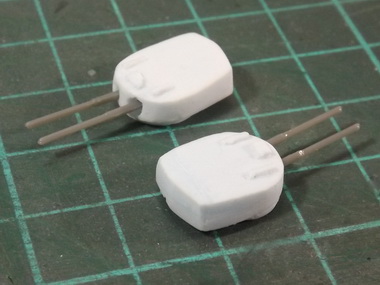
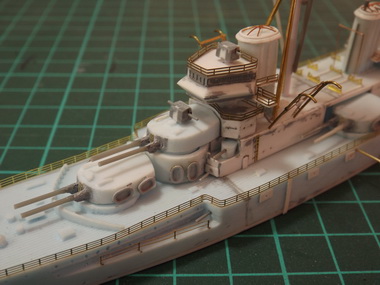
Como dije anteriormente, el kit demanda mucho trabajo extra. Principalmente en lo que respecta a la corrección de varias de sus piezas y a fin de lograr un adecuado encastre. Luego de ensamblar las tres partes que componen el caso comencé con la construcción de las superestructuras, borrando los detalles grabados en la resina y realizándolos en scratch. Asimismo, eliminé los detalles de las torretas principales y otras piezas como las chimeneas, a las cuales les reconstruí los topes. Los cañones principales fueron reemplazados por sobrantes de otros kits. También eliminé y reconstruí el balcón de popa y la plataforma de los reflectores. El puente de mando del kit fue descartado y suplantado por uno de fabricación propia. El mástil principal no se incluye en le kit, por lo que fue realizado con varillas de plástico y de bronce. Una vez hecho todo esto comencé el detallado a base fotograbados provenientes de diversos sets. Próximamente seguiré con el detallado y el reemplazo y construcción de otros componentes.
As I said before, the kit demands a lot of extra work. Mainly in the correction of several of its parts and in order to achieve an adequate fit. After assembling the three parts that make up the hull, I started with the construction of the superstructures, erasing the details engraved in the resin and making them from scratch. Also, I eliminated the details of the main turrets and other parts such as the funnel caps, that were rebuilt and the main guns barrels were replaced by leftovers from other kits. I also eliminated and rebuilt the stern balcony and the reflectors' platform. The bridge provided by the kit was discarded and supplanted by one of my own making. The main mast is not included, so it was made with plastic and bronze rods. Once all this was done I started the detailed with PE parts from different sets. Soon I will continue with the detailing and replacement and construction of other components.

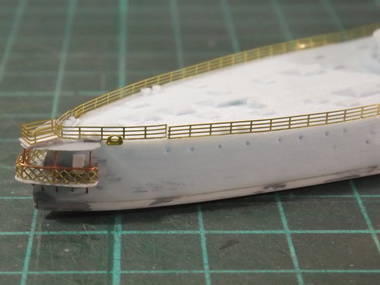
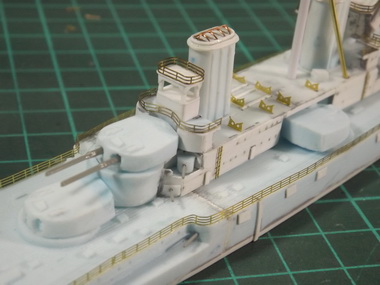

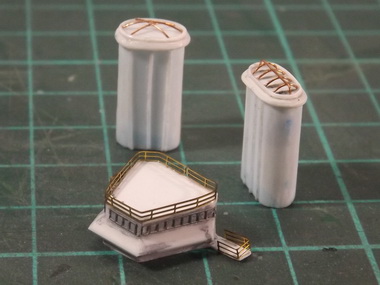
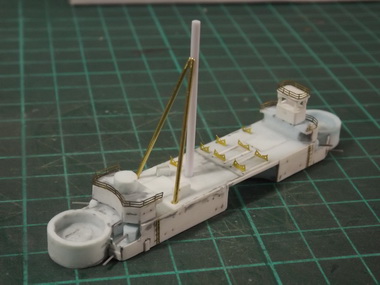
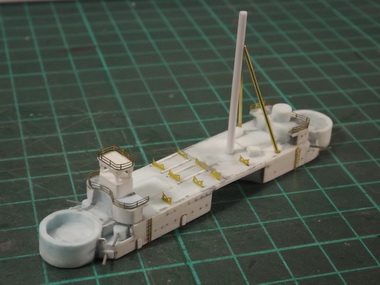
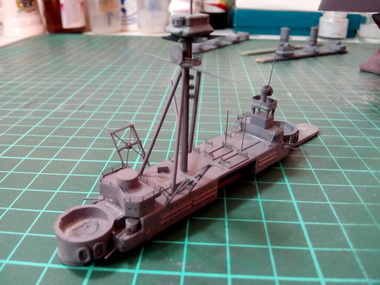
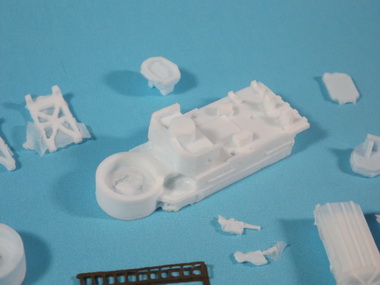
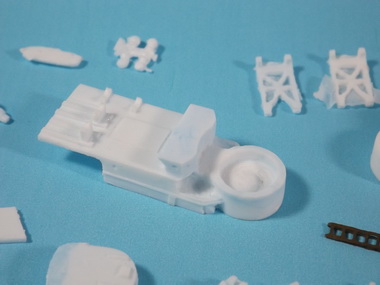
Ahora los últimos trabajos de armado y detallado antes de comenzar con la pintura. Básicamente lo que he hecho fue seguir reemplazando los componentes erróneos del kit y colocar otras piezas construidas en scrtach, entre ellas los pescantes, la plataforma de los reflectores y las balsas salvavidas. El mástil principal fue completamente realizado desde cero ya que no viene incluido en el modelo. En cuanto al detallado, y como ya dije, utilicé restos de diversos sets de fotograbados logrando así realzar el conjunto. Finalmente, el modelo ya está listo para comenzar con su pintado.
Now the last works of assembly and detailing before beginning with paint. Basically what I did was to continue discarding the wrong components of the kit and replace them with other scratchbuilt pieces, including the boats davits, the searchlights platform and the liferafts. The main mast was completely made from scratch as it's not included in the model. As for the detailing, and as I said, I used remain parts from different PE sets thus enhancing the whole. Finally, the model is ready to start with the paint.


Pintura
Painting
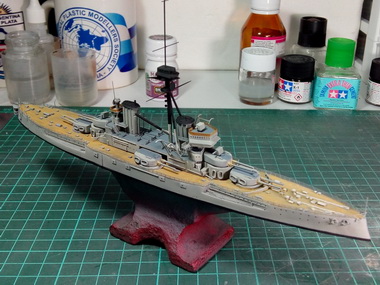
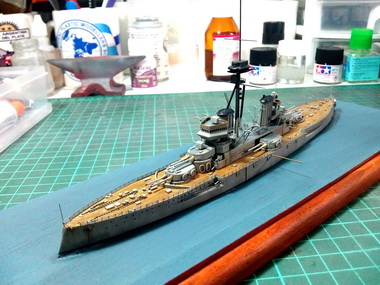
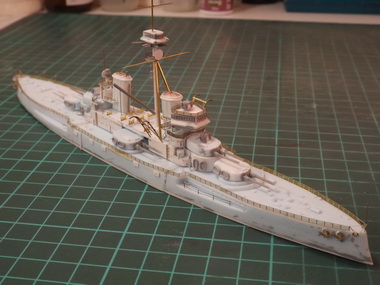
Antes de dar la pintura al modelo le apliqué una mano de imprimación utilizando el primer gris One Shot de AMMO. Luego la pintura fue realizada a base de esmaltes Humbrol y acrílicos de Tamiya principalmente. Por último, el efecto de desgastes fue hecho con óleos como acostumbro habitualmente.
Before painting the model I applied a coat of primer using the One Shot grey from AMMO. Then the painting was made with Humbrol enamels and Tamiya acrylics mainly. Finally, the weathering effects was done with oils as I usually do.