DKM ADMIRAL GRAF SPEE
ACADEMY - 1:350
Año de construcción / Year of build: 2024/2025
Hace muchos años que estaba detrás de un modelo en esta escala del famoso acorazado de bolsillo. Tanto es así, que habiéndolo adquirido recientemente, he descartado otros modelos que tenía previstos como próximo proyecto y me voy a dedicar entonces a la construcción de esta maqueta. El kit de Academy es muy bueno en general, no obstante, como todo modelo naval es necesario el agregado de algunos accesorios para darle más realismo al trabajo final. Para ello, echaré mano del set de fotograbados de Eduard, con otros productos más que iré detallano a medida que avance la construcción.
From many years ago I was looking for a model in this scale of the famous pocket battleship. So much so, that having recently acquired it, I have discarded other models that I had planned as my next project and I'm going to dedicate myself to the construction of this one. The Academy kit is very good in general, however, like any naval model it's necessary to add some accessories to provide more realism to the final work. To do this, I will use Eduard's photo-etched set, with other products that I will detail as the construction progresses.
Construcción
Building
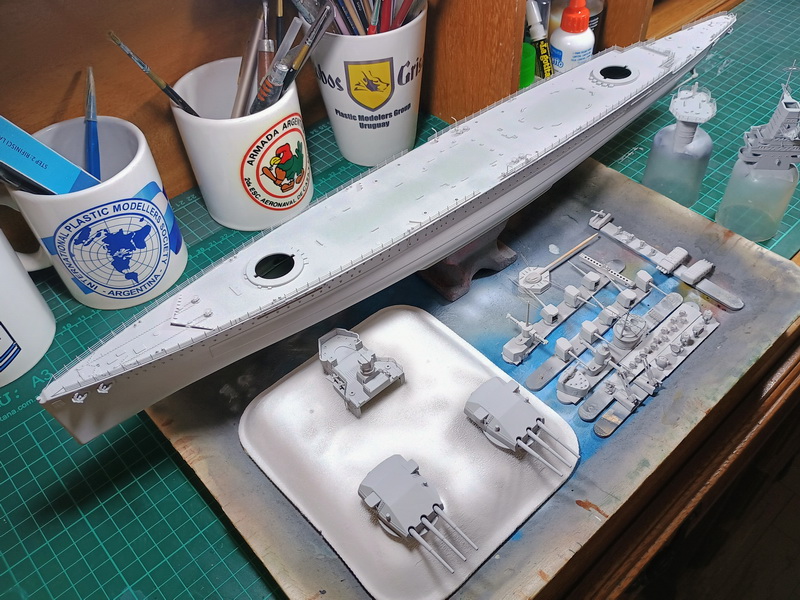
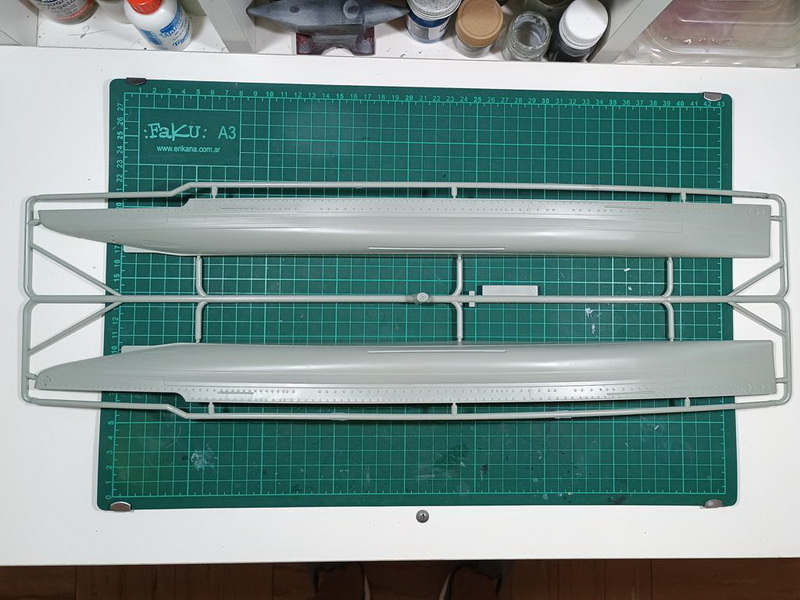
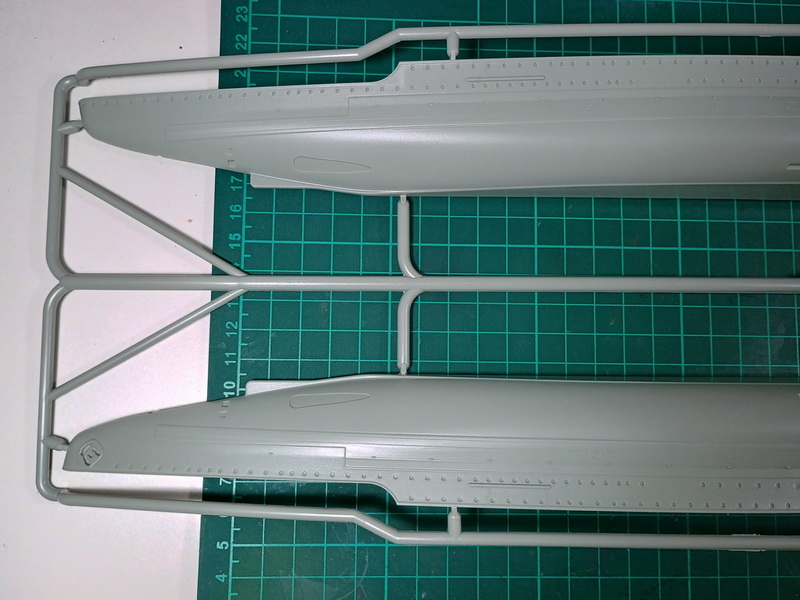
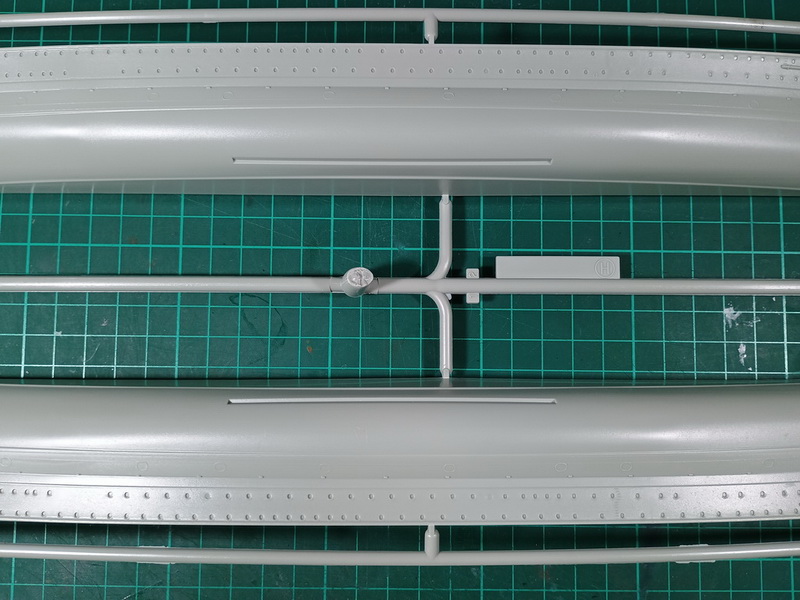
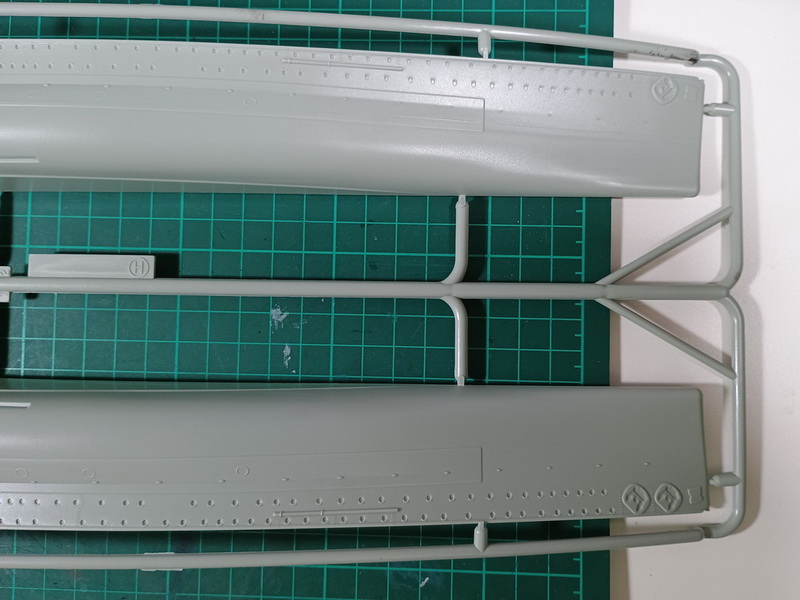
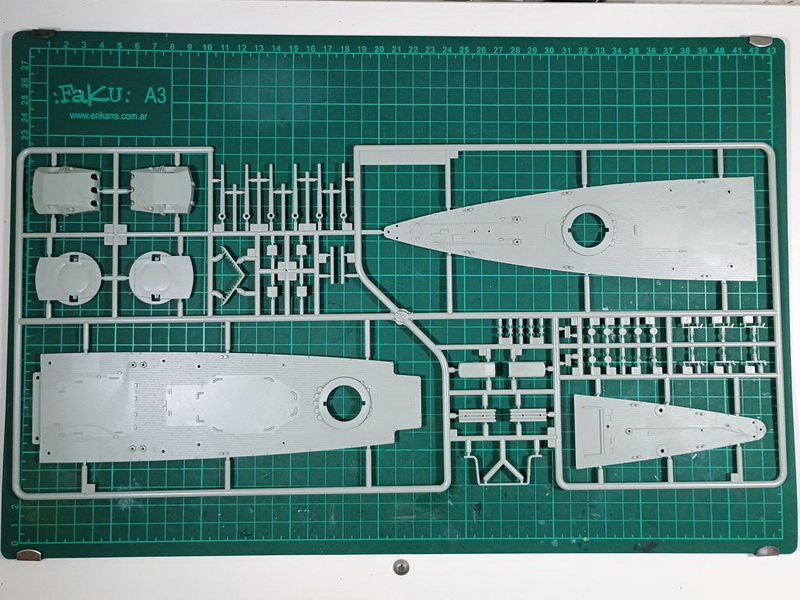
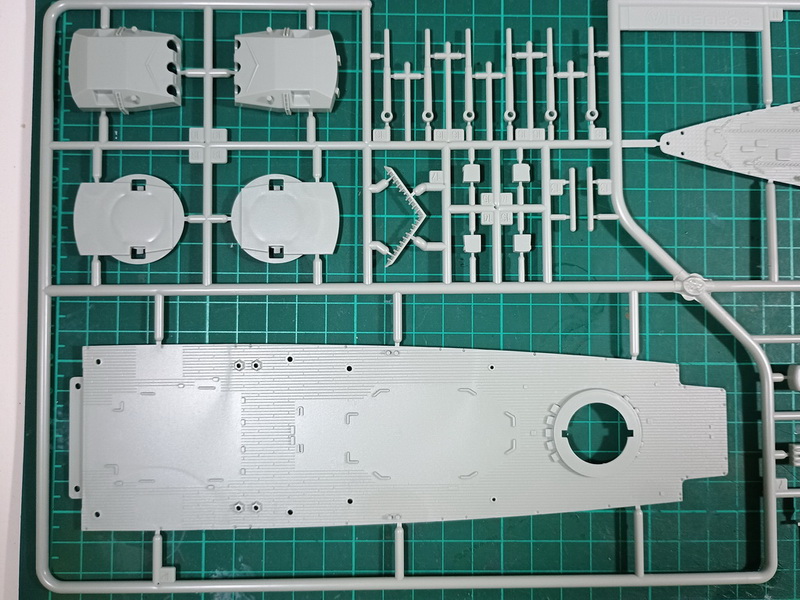
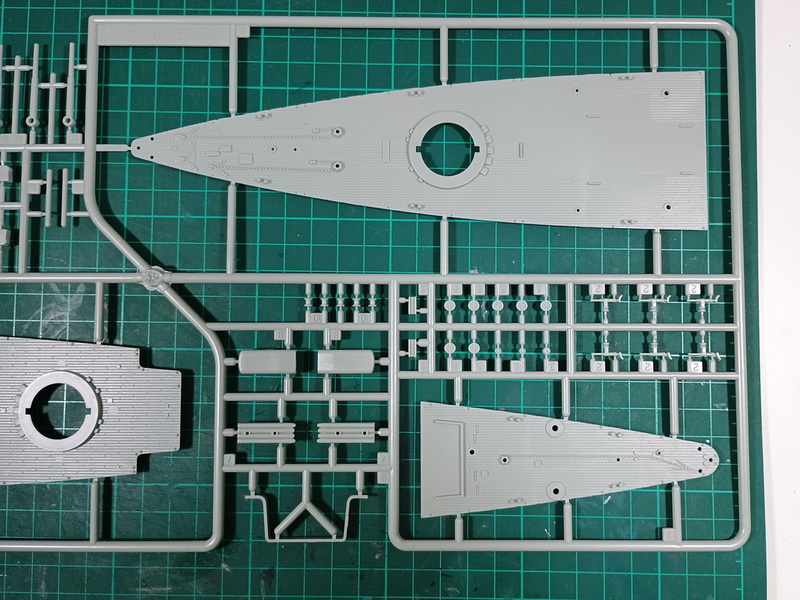
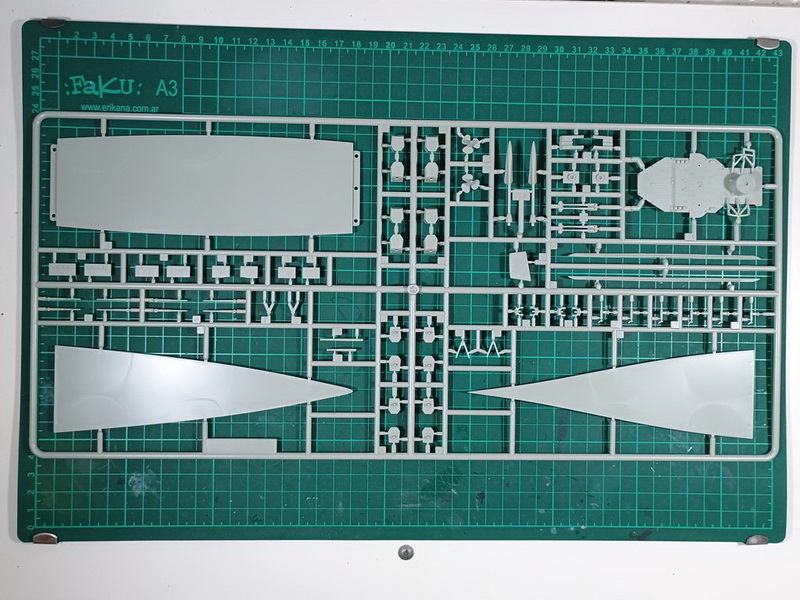
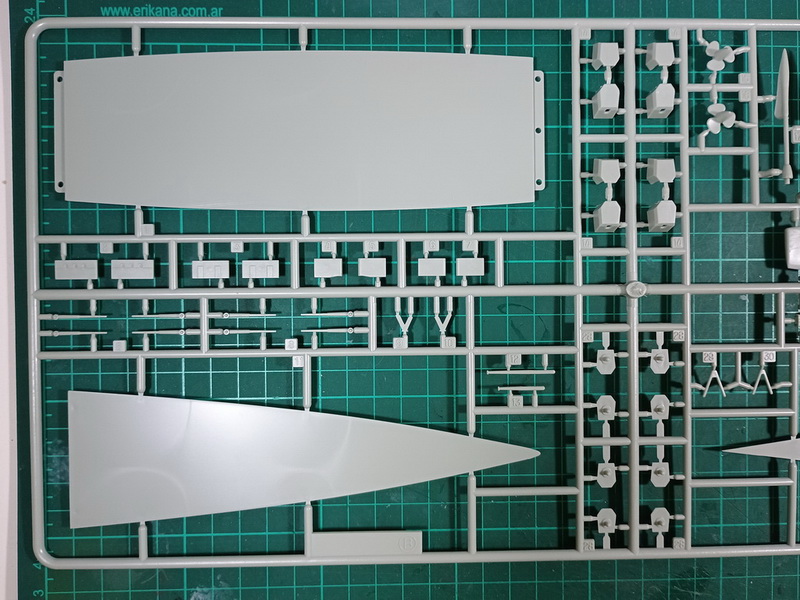
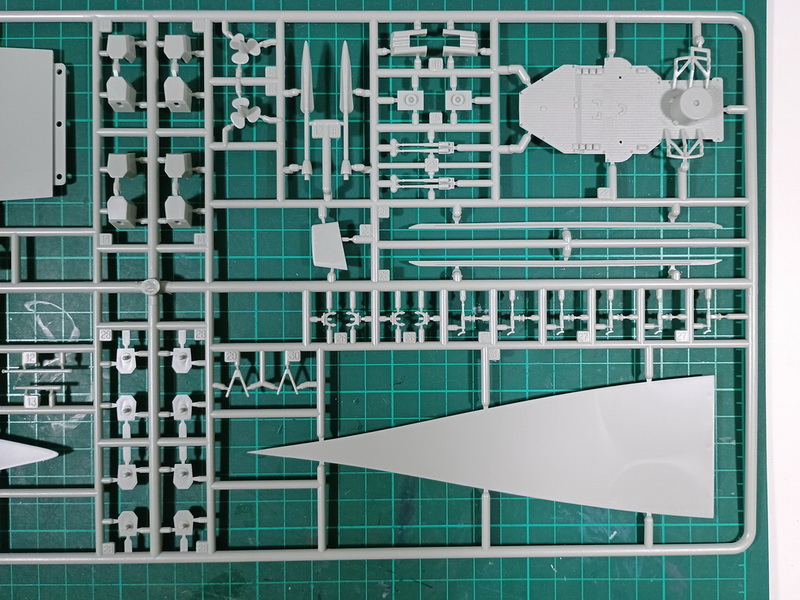
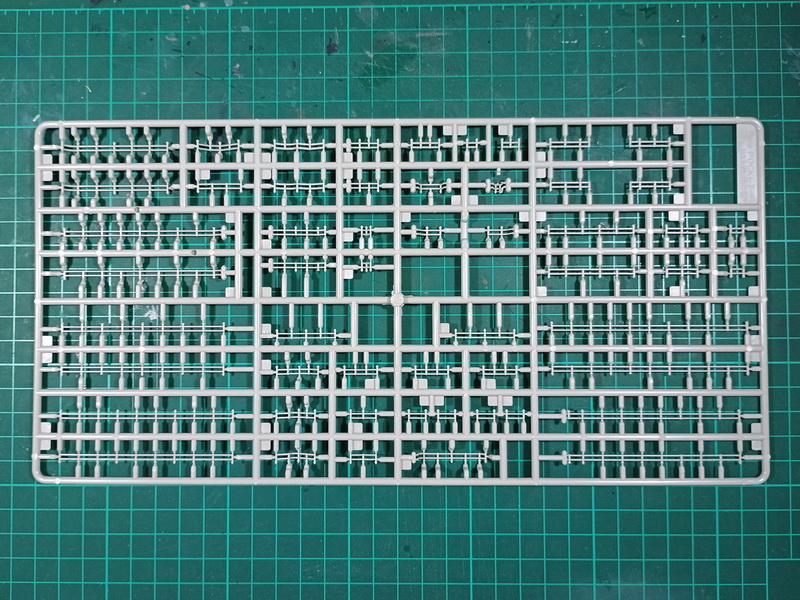
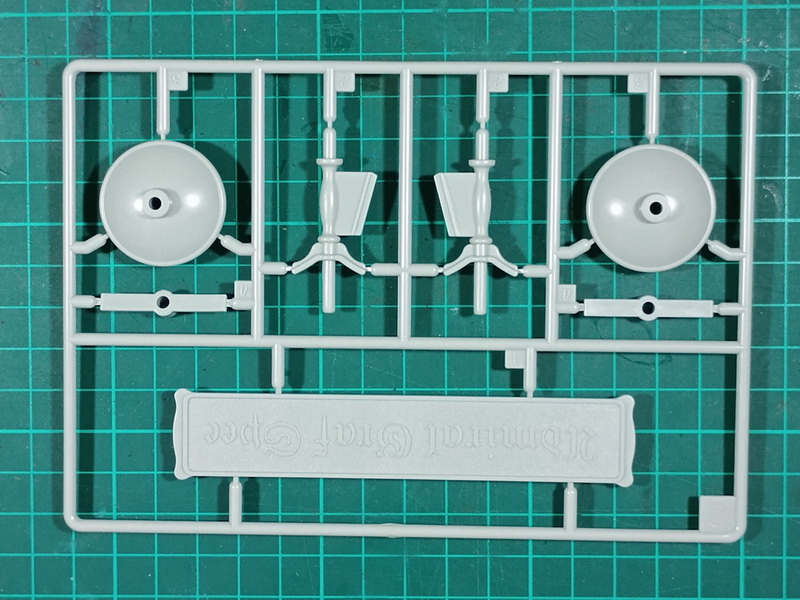
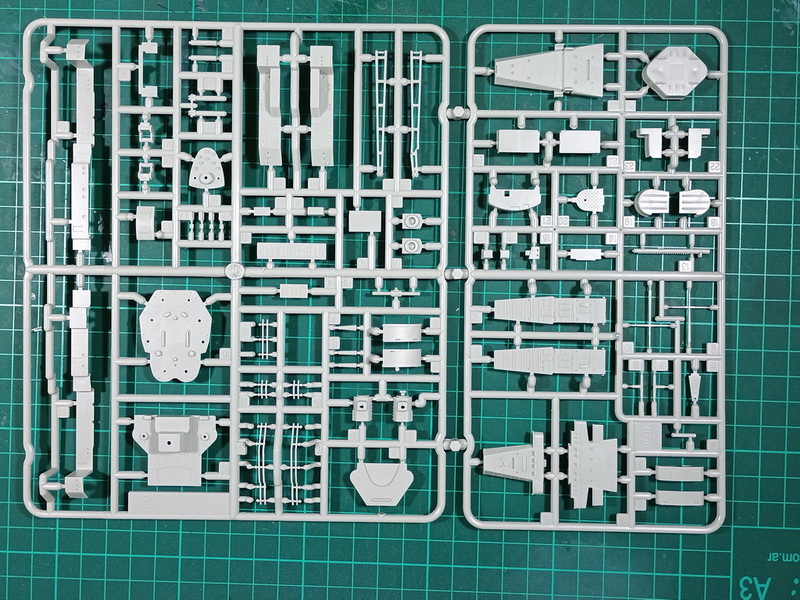
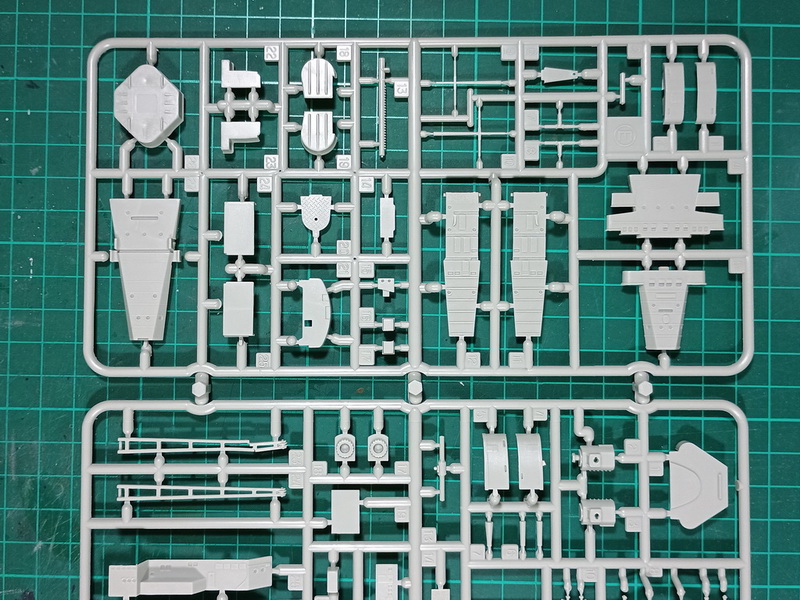
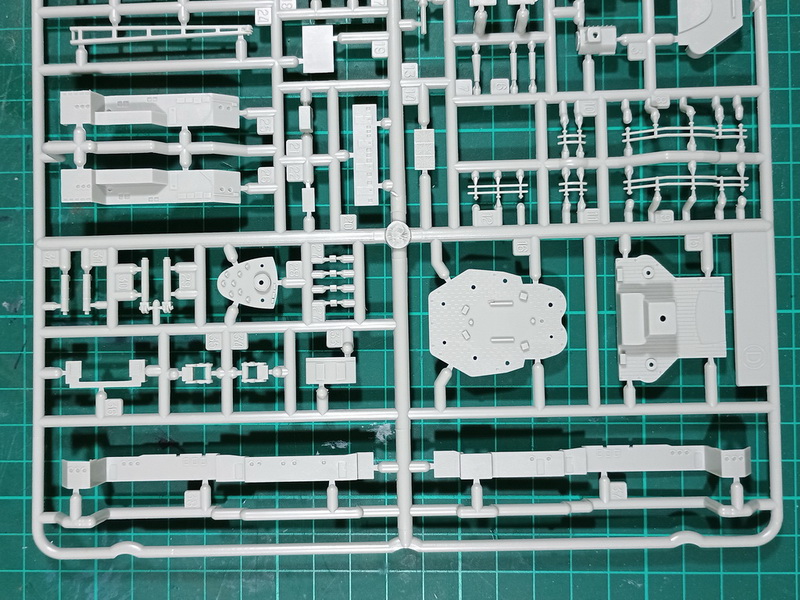
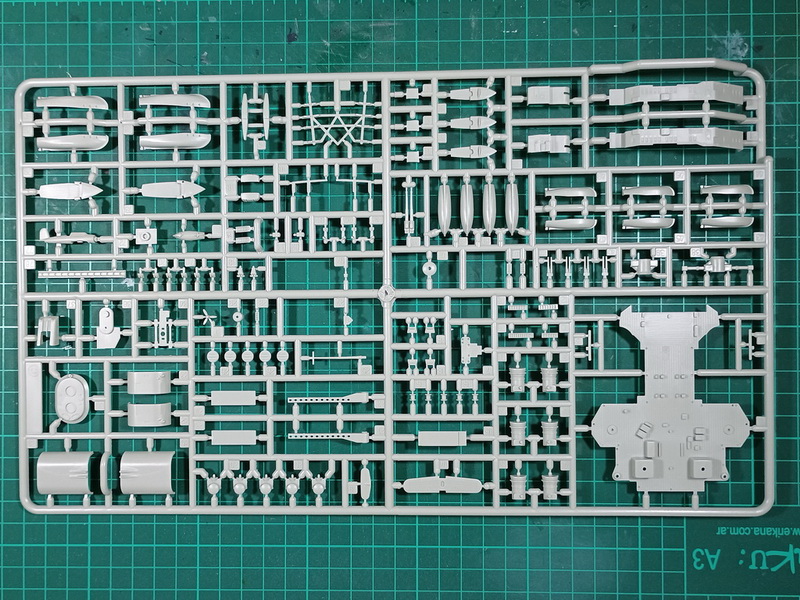
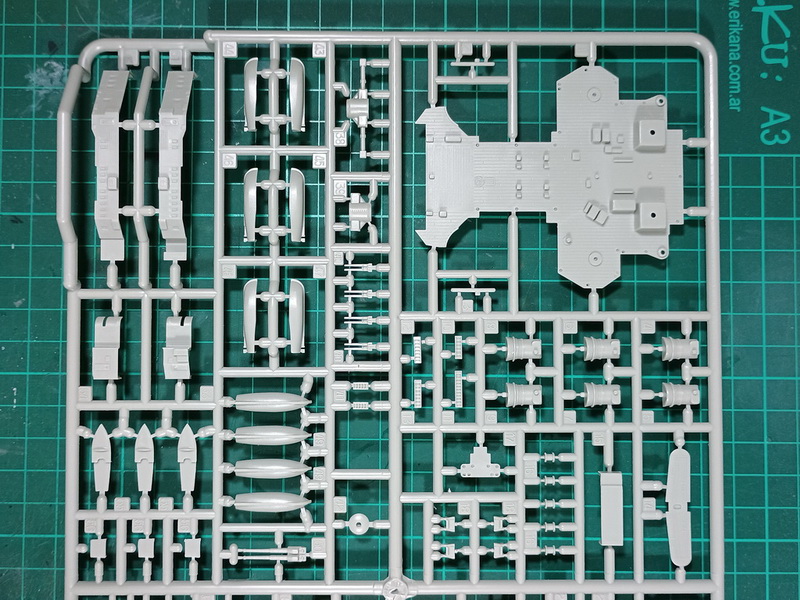
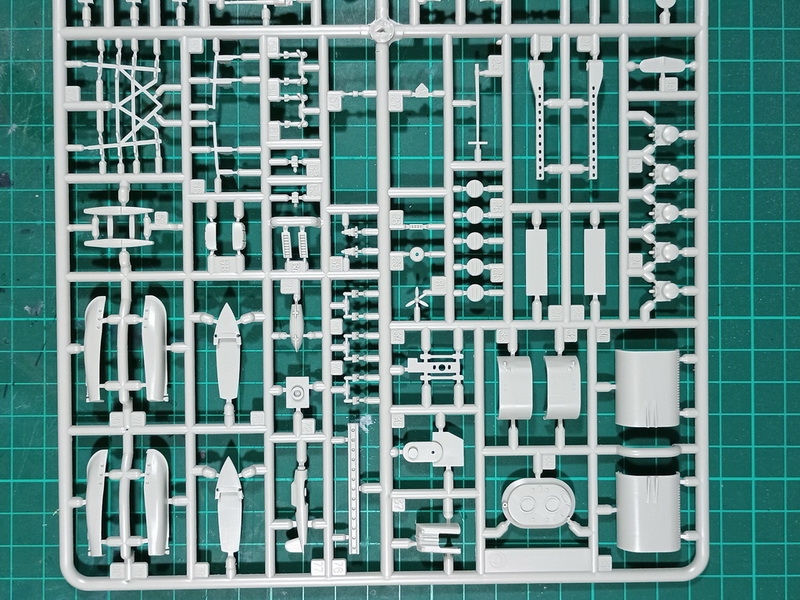
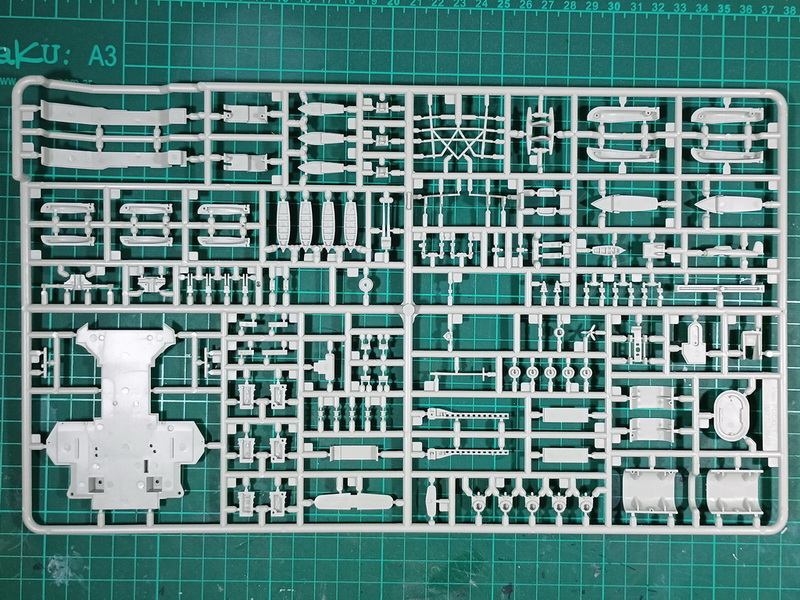
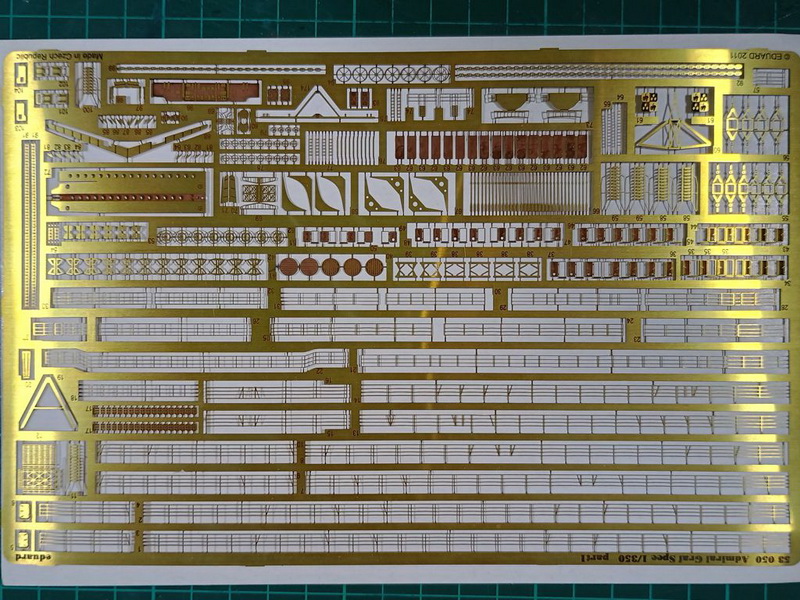
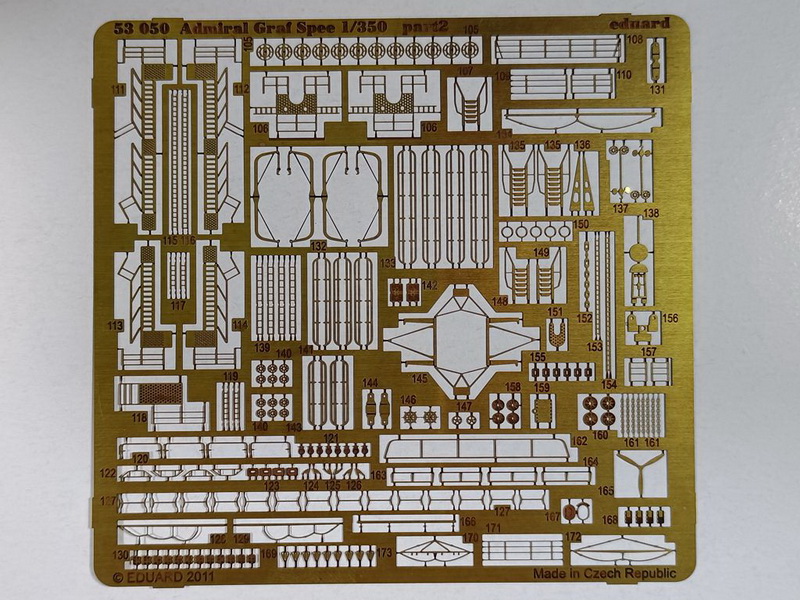
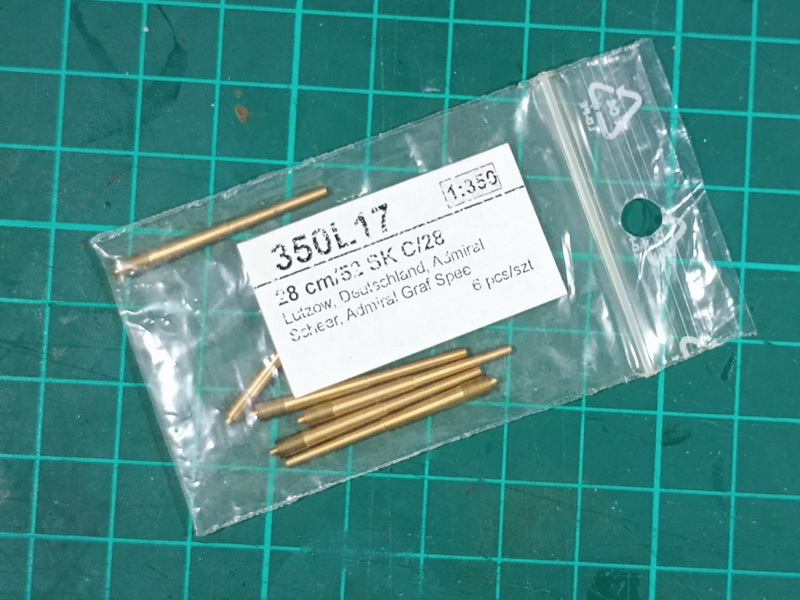
Como es mi costumbre antes de comenzar con el paso a paso del armado de la maqueta, dejo aquí algunas fotos de los componentes del kit, más el detalle del set de Eduard dedicado al mismo. También, los cañones torneados en metal que reemplazarán a los de plástico.
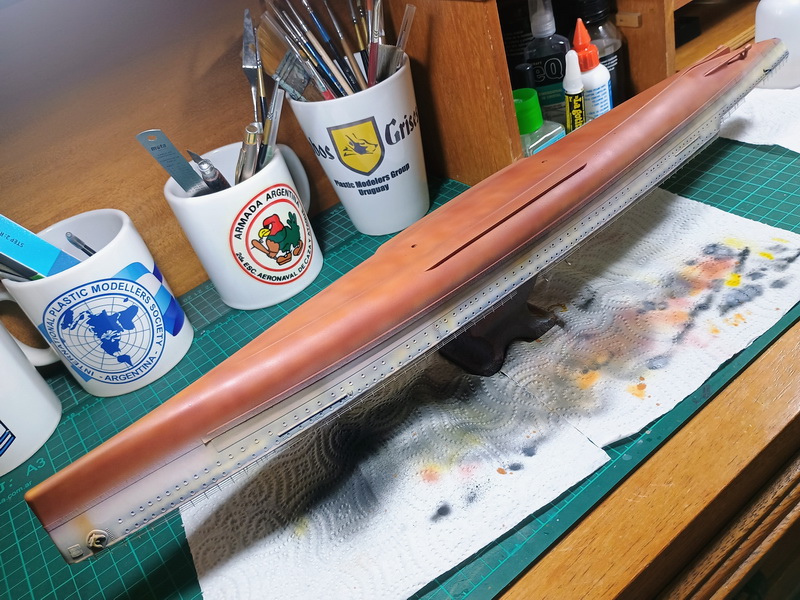
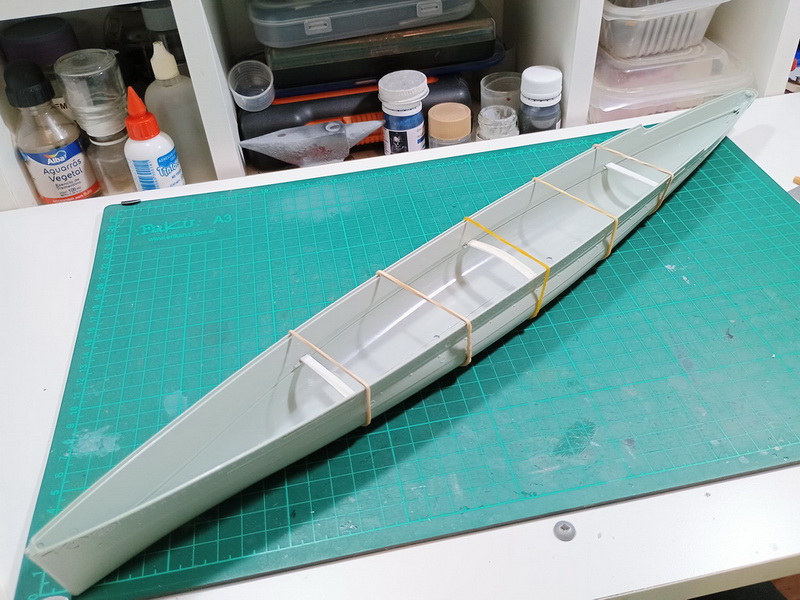
Comenzando el ensamblado, lo primero fue pegar ambas mitades del casco, que presentó algo de trabajo, pero que pude resolverlo fácilmente colocando unos refuerzos internos y sujetando con algunas bandas elásticas hasta el secado completo del pegamento. Luego, no podía faltar, el masillado y lijado de la unión. El kit de Academy posee algunos detalles en el casco que, luego de estudiar detenidamente el material fotográfico que poseo pude concluir que no se encuentran en el buque original, por lo cual debí eliminarlos lijándolos. Además, realicé en plástico el águila imperial de la popa, para reemplazar la calca que provee el fabricante.
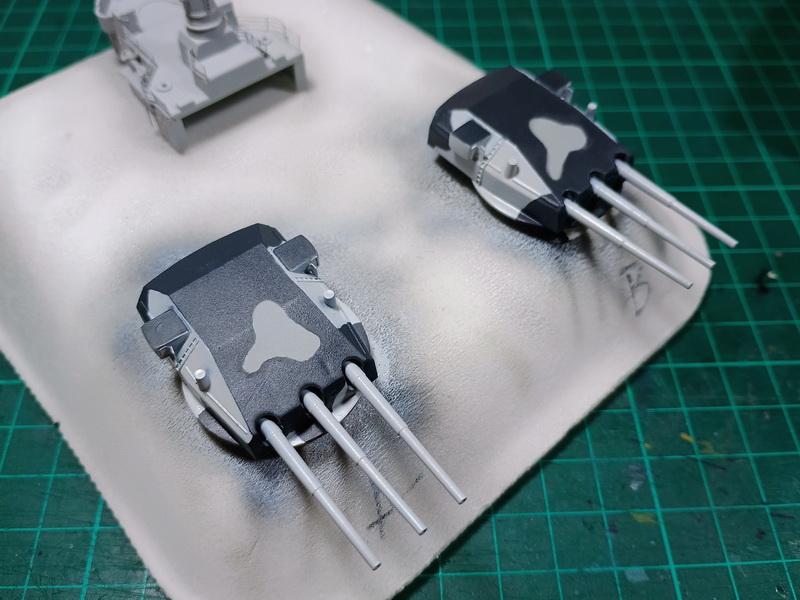
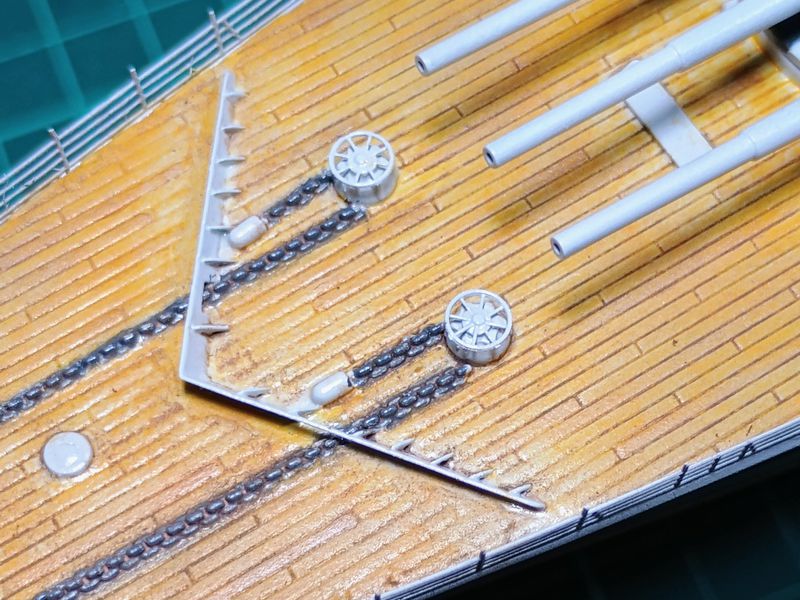
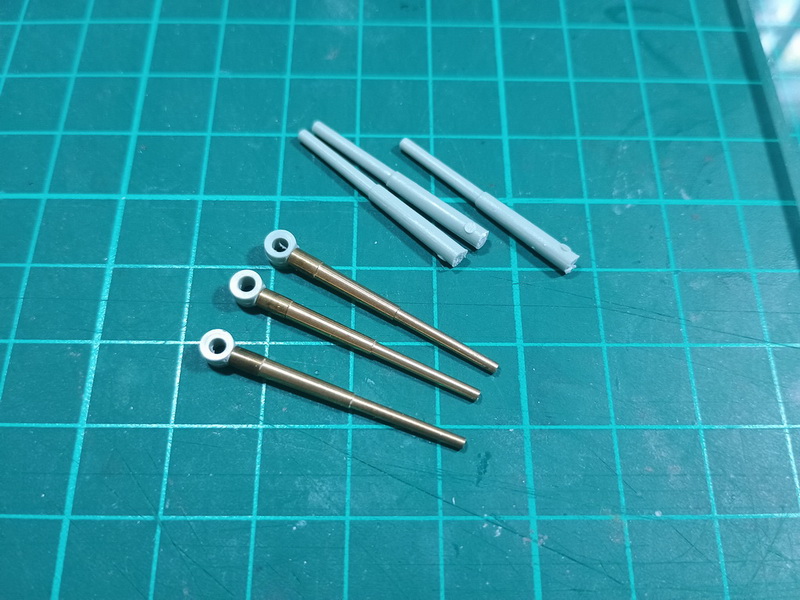
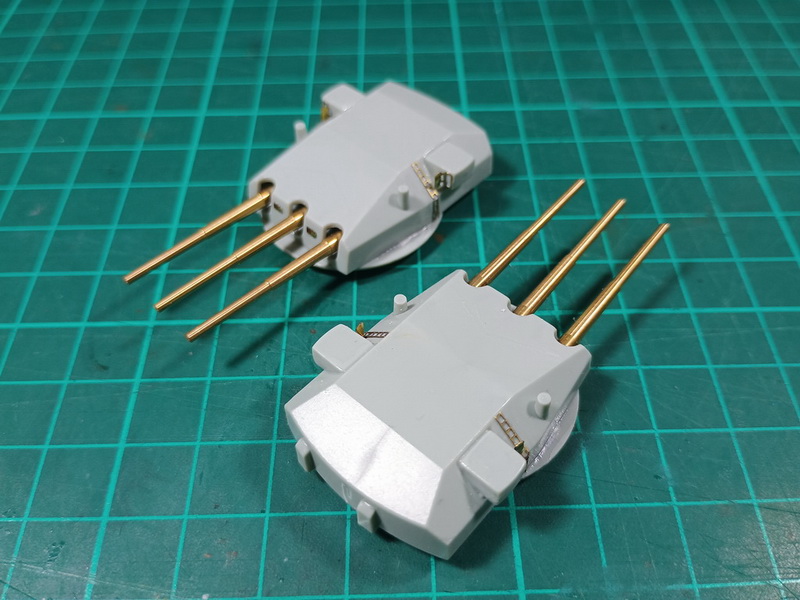
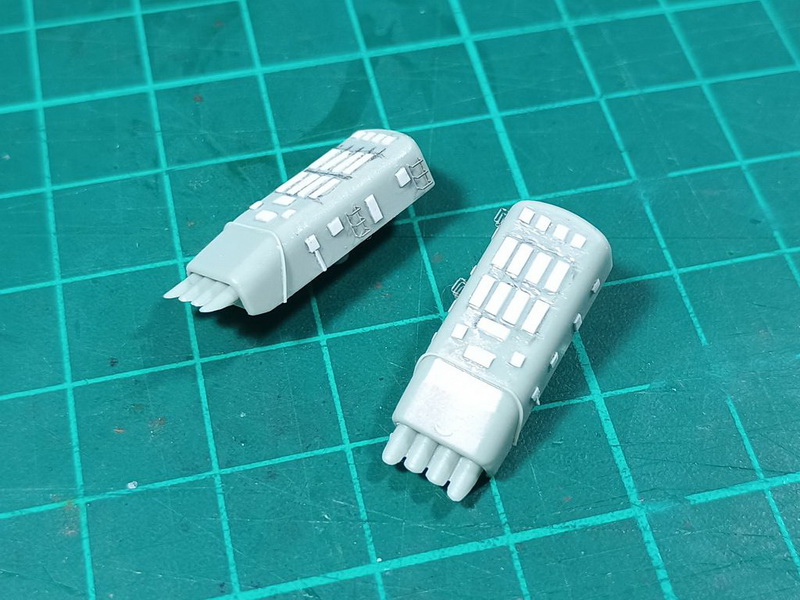
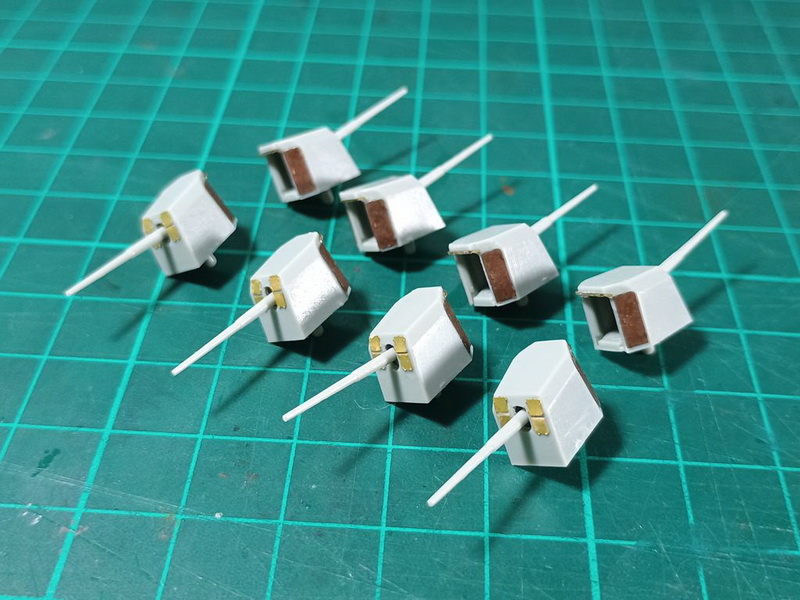
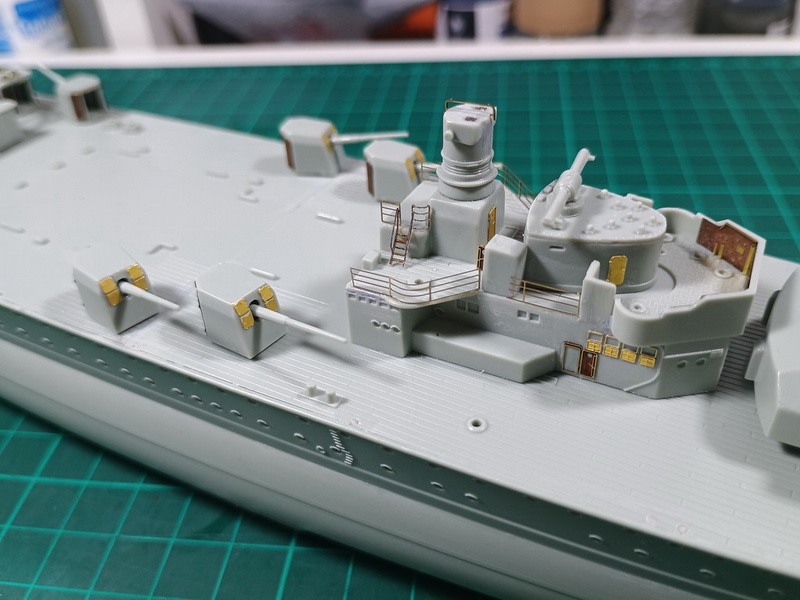
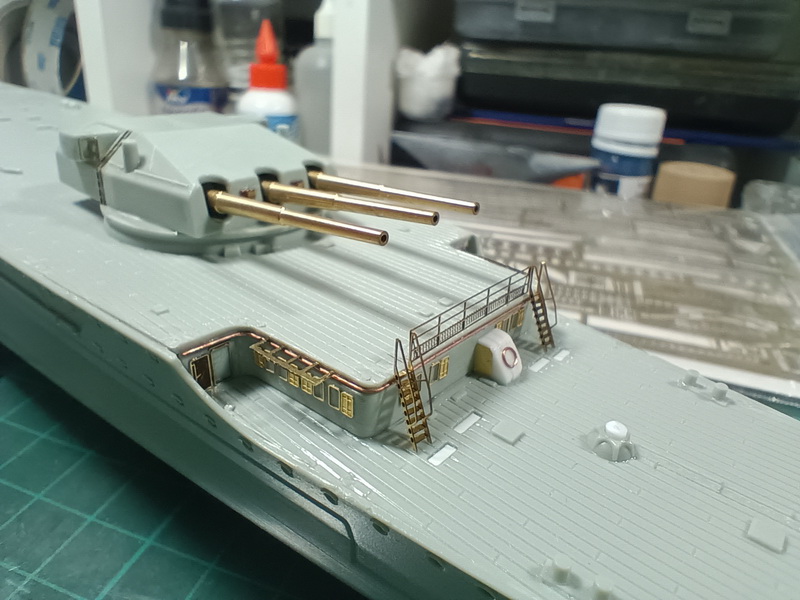
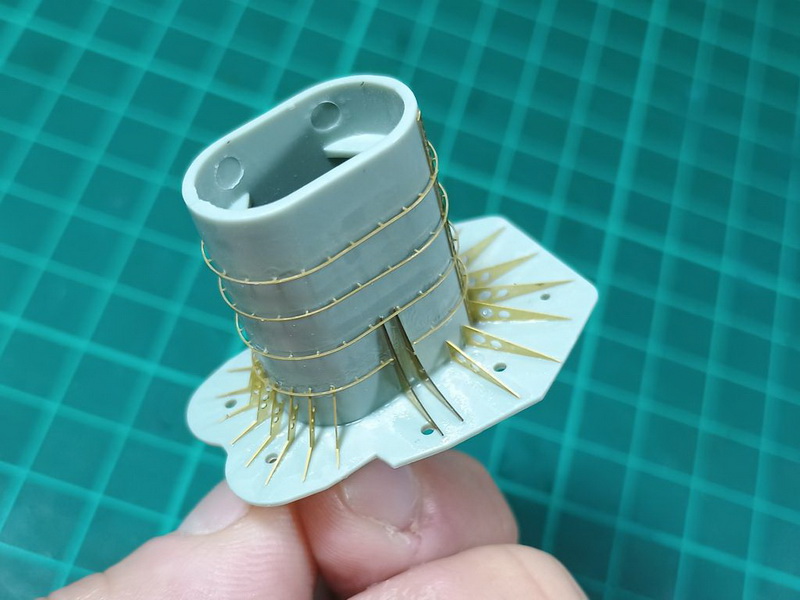
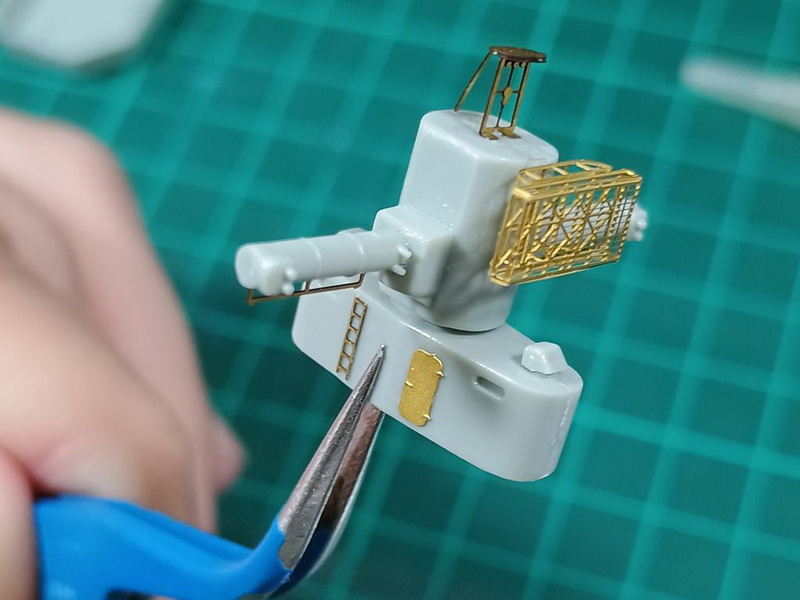
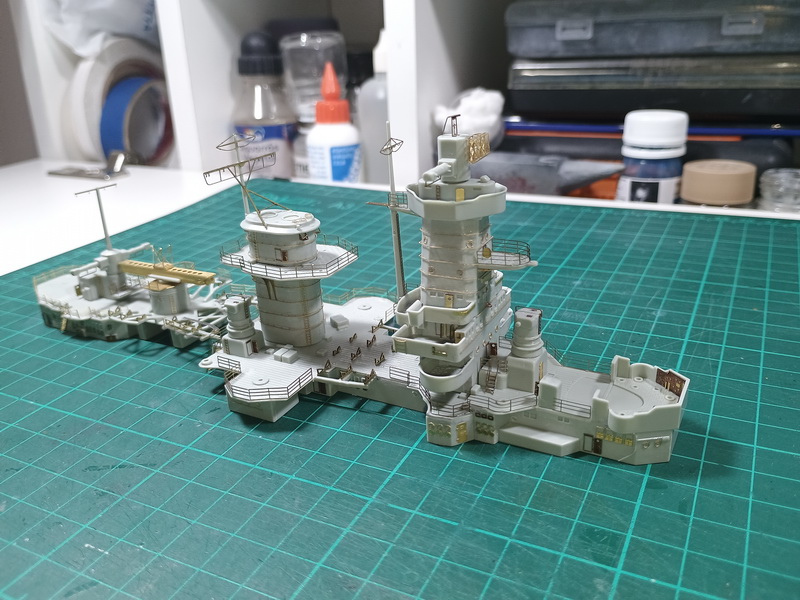
Habiendo terminado con el ensamablado del casco, pegué las piezas que componen la cubierta principal para luego comenzar con las superestructuras y armamento. Como anticipé, los cañones principales de plástico fueron reemplazados con cañones torneados en metal, luego detallé las torretas con fotograbados del set de Eduard, lo mismo que realicé con los componentes del armamento secundario. A su vez, detallé las carcasas que cubren los tubos lanza torpedos, ya que el kit las trae completamente lisas.
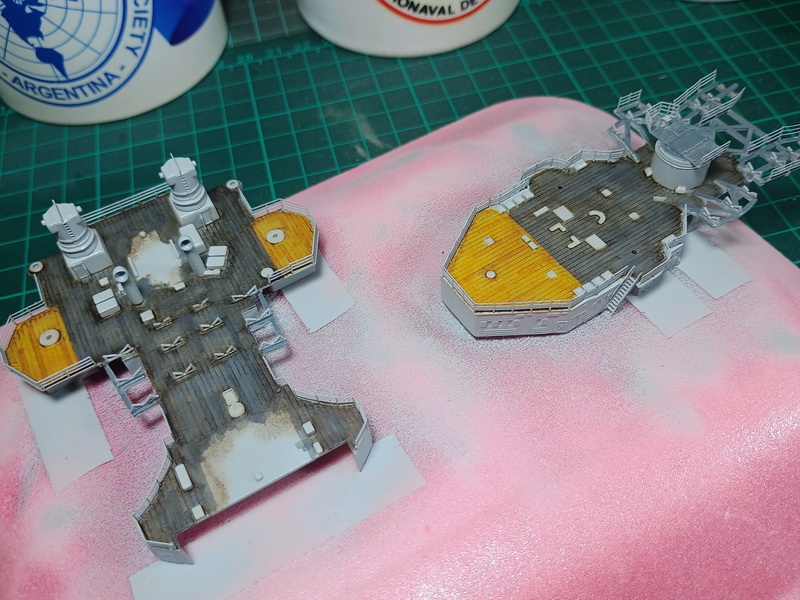
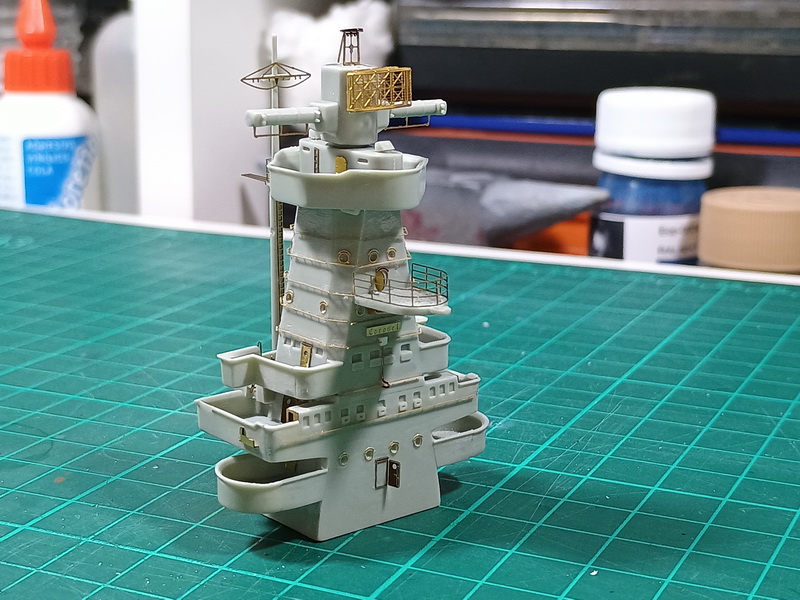
En cuanto a las superestructuras, comencé con la construcción de las de proa y popa, ensamblando sus componentes y detallando con los fotograbados.
As usual, before starting the step-by-step assembly of the model, I post some photos of the kit components, plus the detail of Eduard's set dedicated to it. Also, the metal gun barrels that will replace the plastic ones.
Starting the assembly, the first thing was to glue both halves of the hull, which presented some work, but I was able to solve it easily by placing some internal reinforcements and holding with elastic bands until the glue had completely dried. Then, I couldn't ignore the putty and sanding of the joint. The Academy kit has some details on the hull that, after carefully studying the photographic material that I have, I was able to conclude that they were not on the original ship, so I had to eliminate them by sanding. Additionally, I made the imperial eagle on the stern in plastic, to replace the decal provided by the manufacturer.
Having finished assembling the hull, I glued the main deck and then began with the superstructures and weapons. As I anticipated, the plastic main gun barrels were replaced with metal ones, then I detailed the turrets with photo-etched parts from Eduard's set, the same as I did with the secondary weapons components. At the same time, I detailed the casings that cover the torpedo tubes, since the kit comes with them completely flat.
As for the superstructures, I began with the construction of the bow and stern ones, assembling their components and detailing them with the photoetched parts.
Para ver las imágenes en mayor resolución hacer click derecho sobre la misma y seleccionar "Ver imagen / Abrir imagen..."
To see the images in higher resolution, right click on it and select "View image / Open image..."

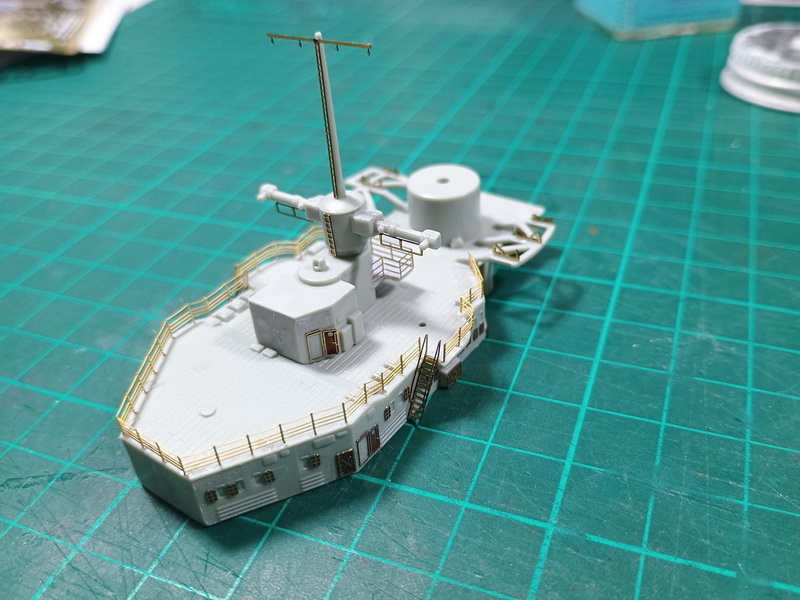
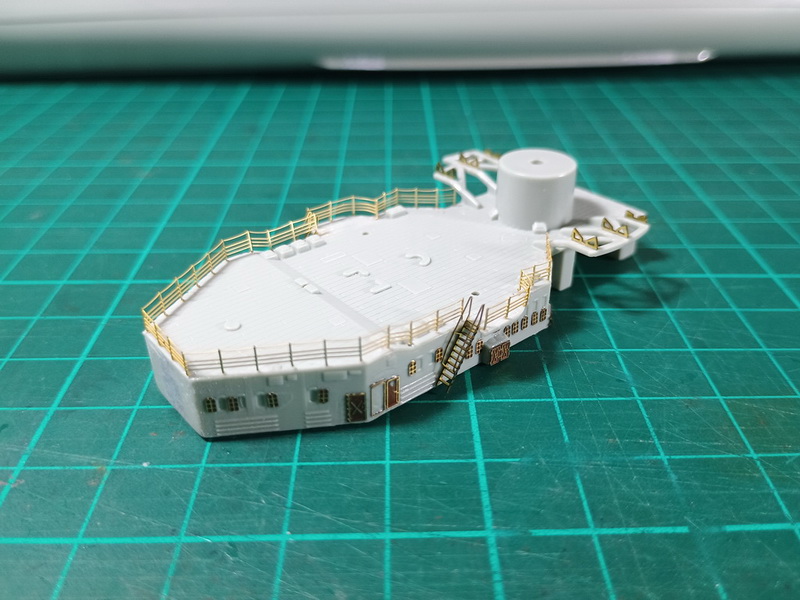

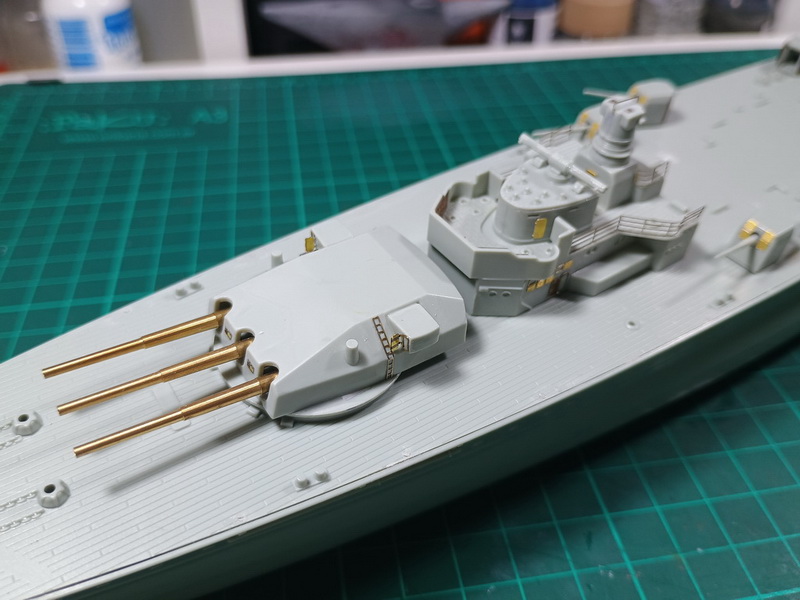
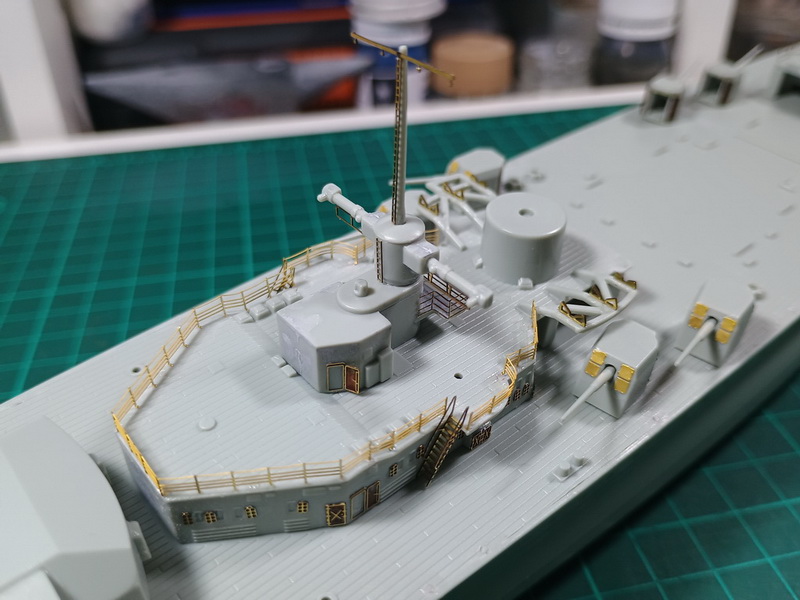
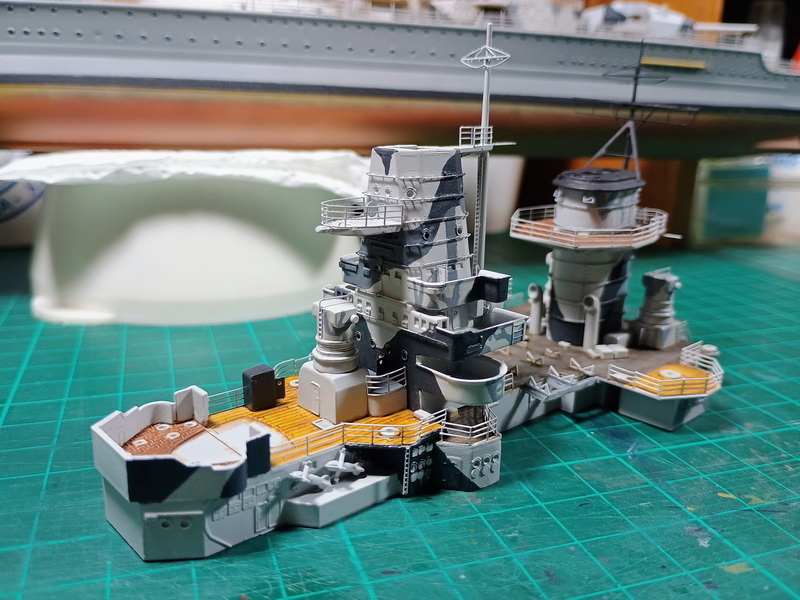
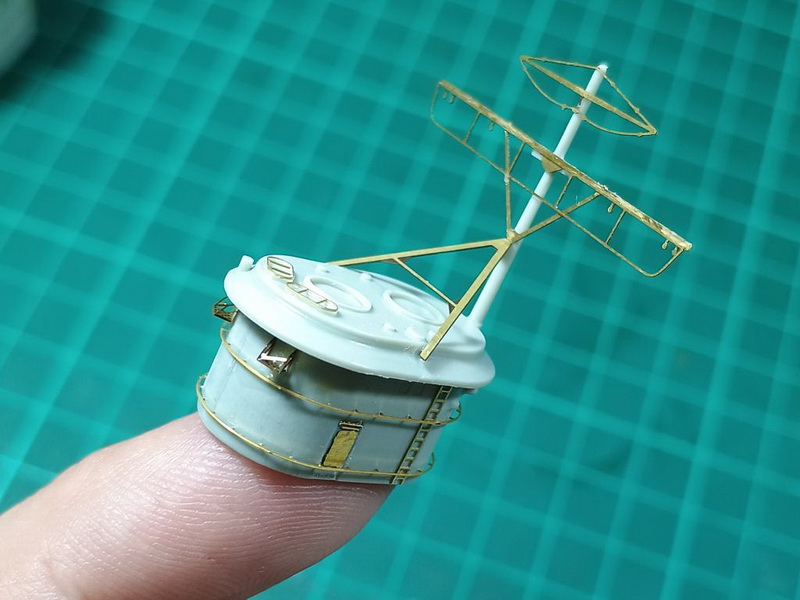
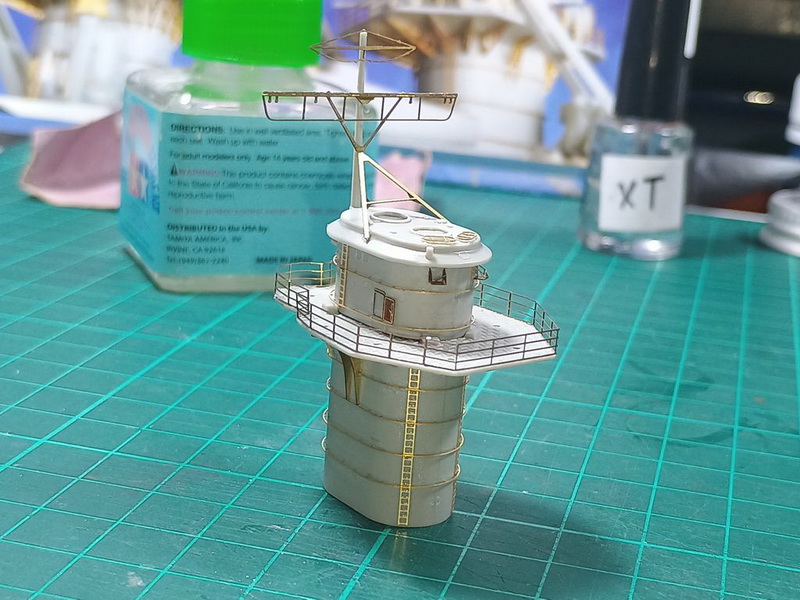
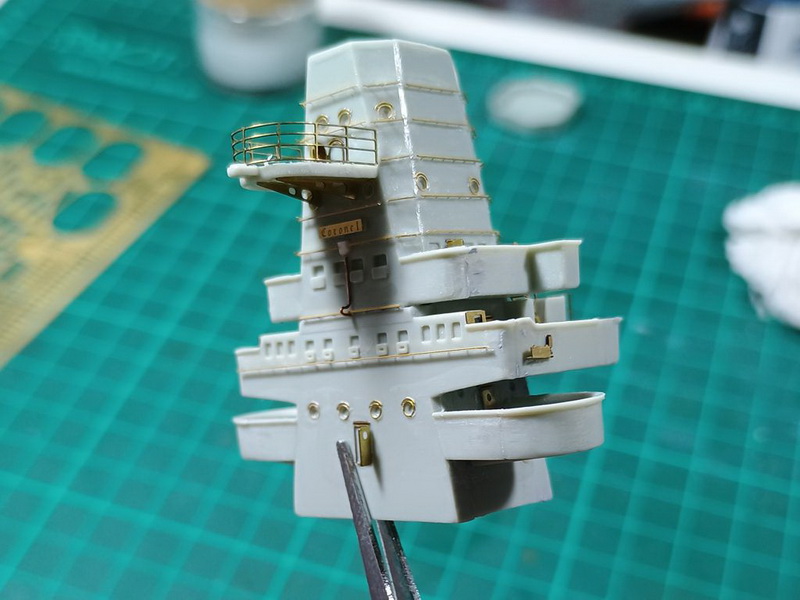
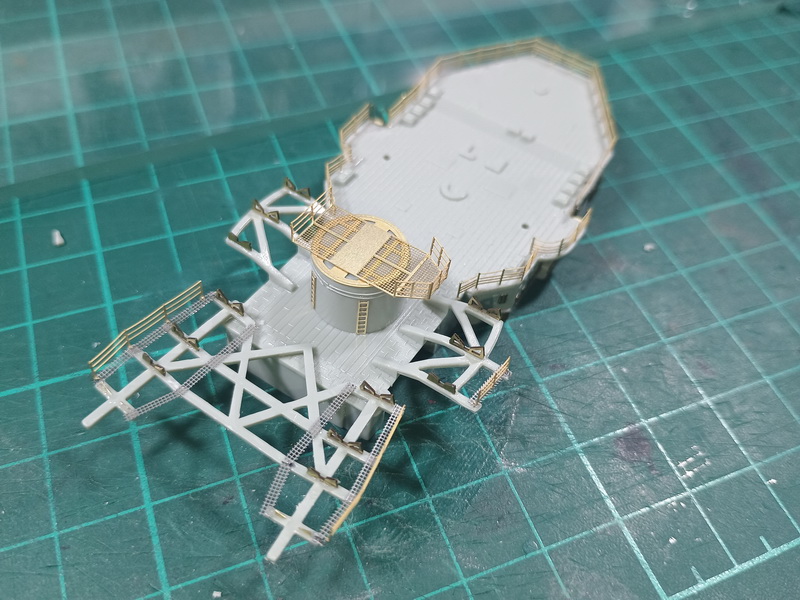
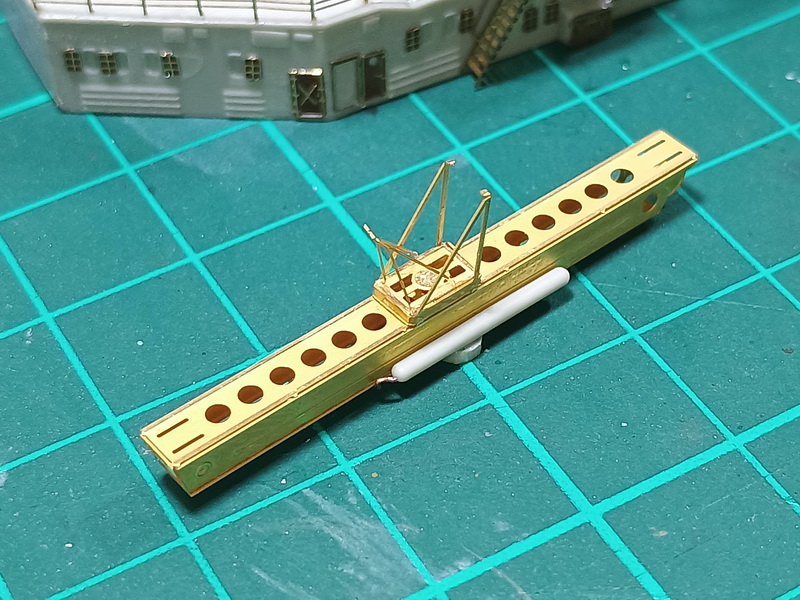
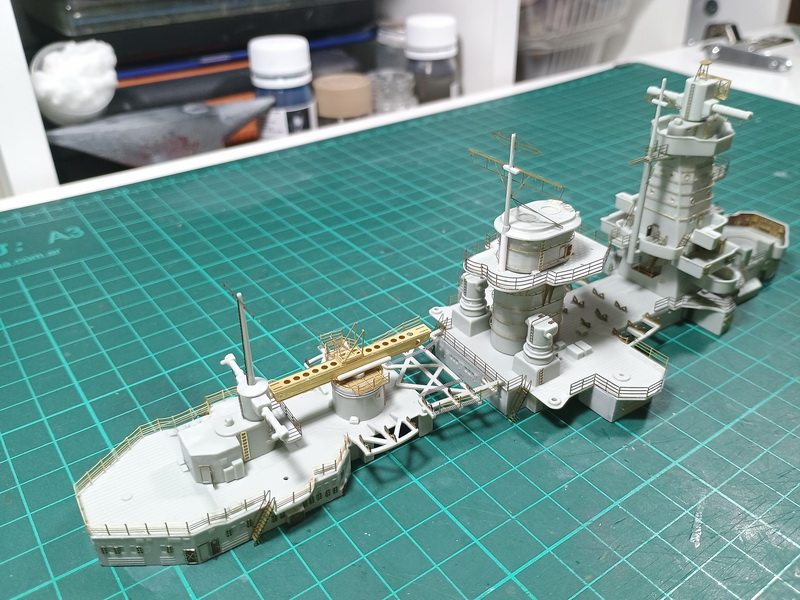
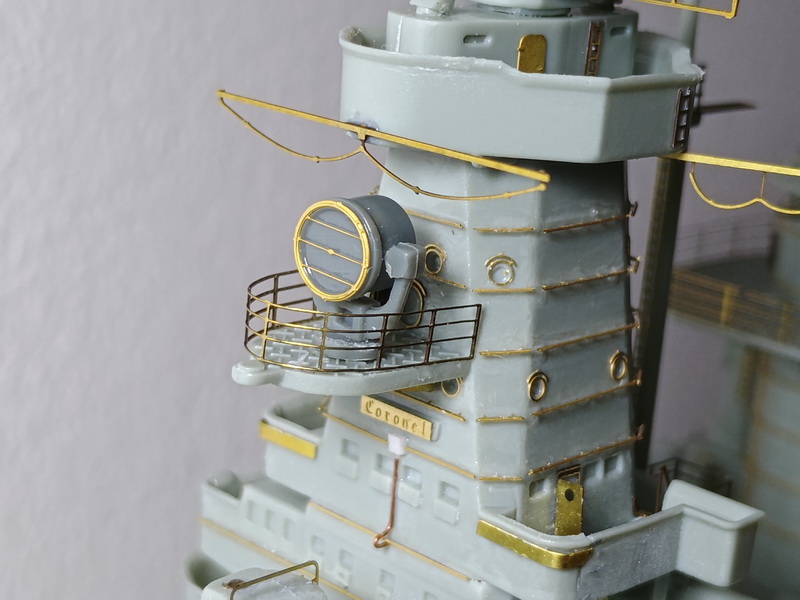
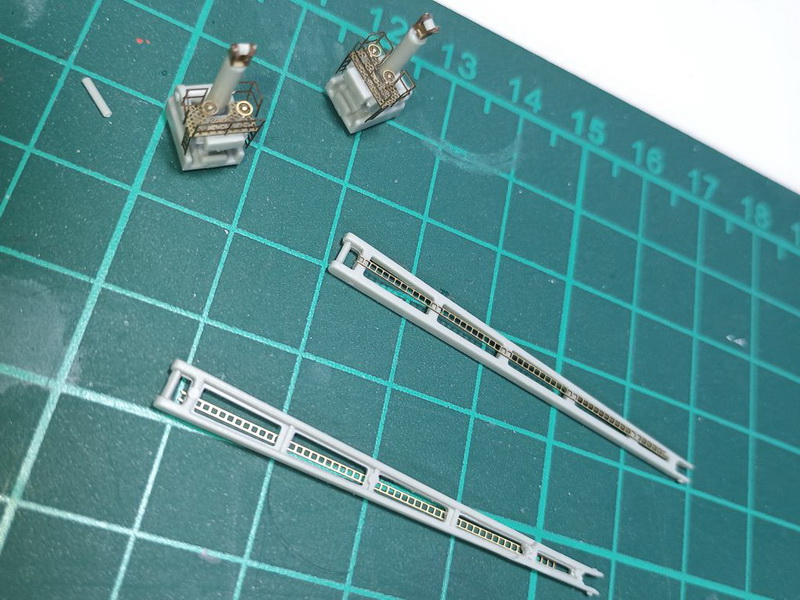
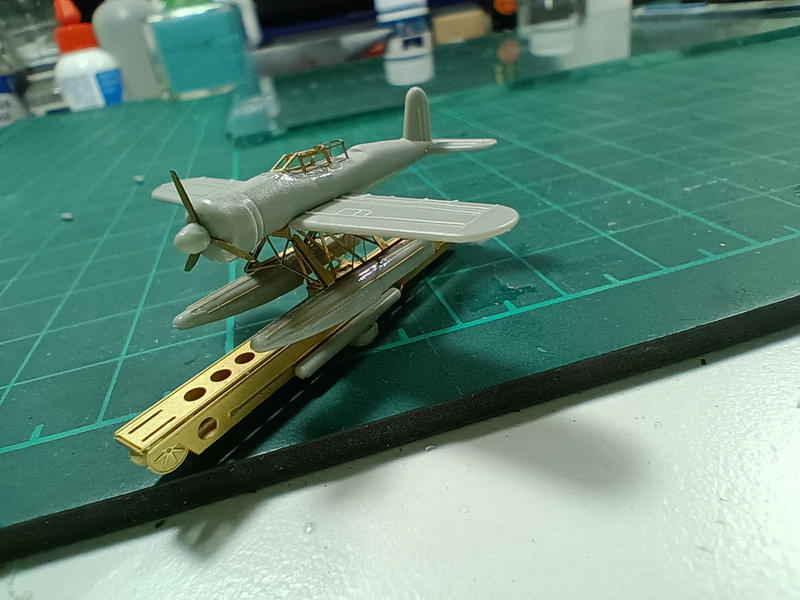
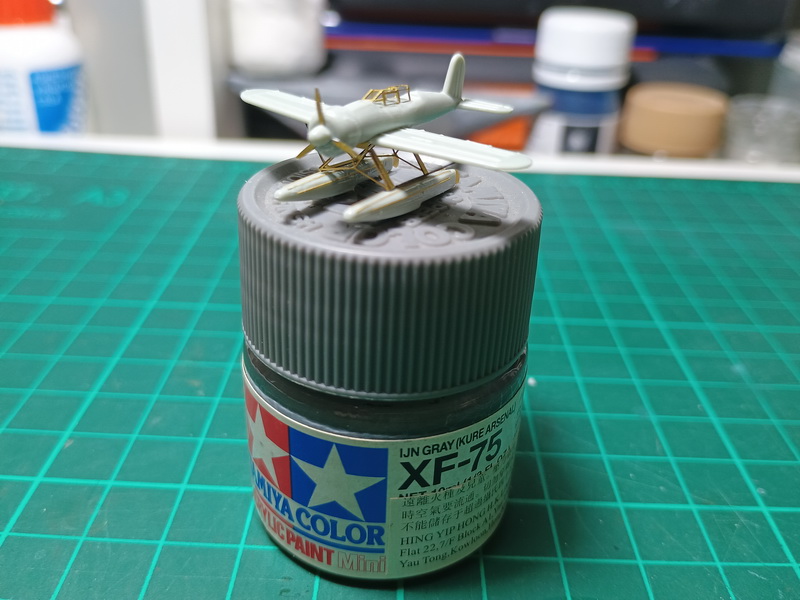
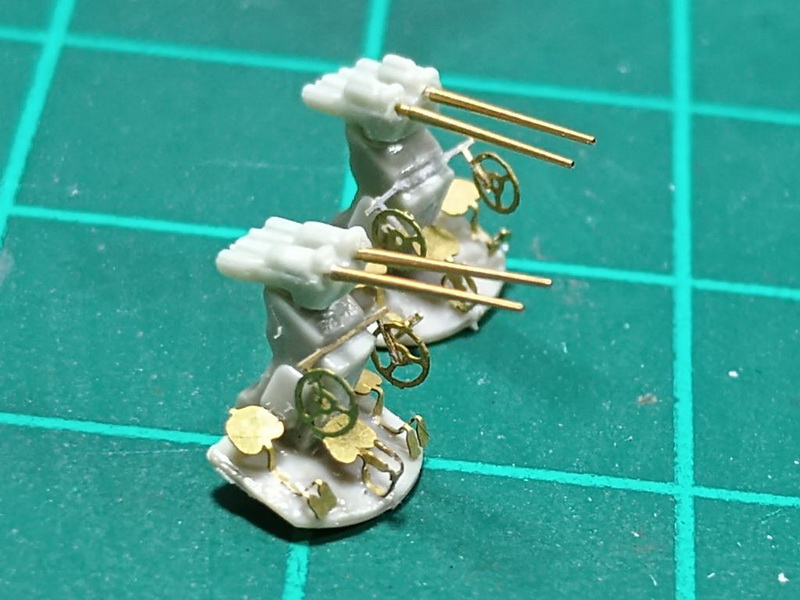
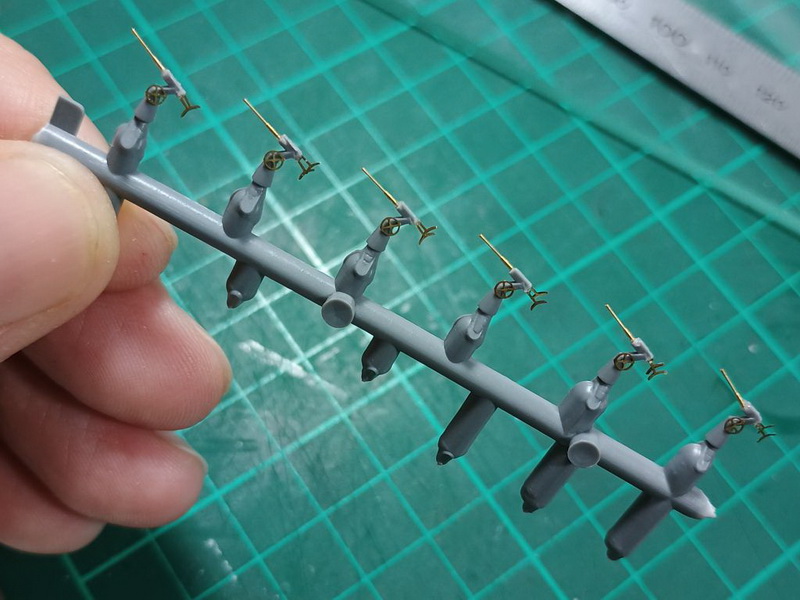
Comienza ahora el trabajo de armado y detallado de las superestructuras del buque. Luego de agregar las escaleras que comunican con la cubierta de popa y mejorar ese sector con los respectivos fotograbados, di inicio a la construcción de la chimenea. est parte presenta una especial dificultad en cuanto la cantida y complejidad de algunos elementos como la colocación de las pasarelas que rodean la estructura y las ménsulas que soportan la plataforma de los reflectores. A continuación, con el ensamblado del puente, el trabajo se torna más difícil con la colocación de las pasarelas que lo rodean, más complejas de pegar que las de la chimenea. Estos elementos me impedirán más adelante enmascarar la zona para pintar el camuflaje, por lo que las manchas del mismo deberé pintarlas muy cuidadosamente a pincel. También construí el telémetro, coloqué el mástil y agregué otros detalles a base del set de fotograbados y otros de construcción propia. Sobre la estructura más a popa irá la catapulta del hidroavión, una pieza finamente detallada y lograda en fotograbado por Ka-Models, que utilicé en preferencia a la del set de Eduard. Asimismo, se detallaron las grúas y el Arado AR-196. Para la realización de los reflectores, deseché los del kit de Academy por no resultarme adecuados y utilicé los sobrantes del kit del Bismarck de Trumpeter, modificándolos para asemejarlos a los pertenencientes al Graf Spee. Otras piezas que fueron descartadas son las anitaéreas de 37mm y las ametralladoras de 20mm, reemplazadas por sobrantes del Z-30 de Trumpeter y del USS Ward de Mirage respectivamente. Luego las detallé con los fotograbados de Eduard y otros sobrantes, añadiendo los cañones de metal de Master.
The work of assembling and detailing the ship's superstructures now begins. After adding the stairs that connect to the aft deck and improving that sector with the respective photo-etched parts, I began the construction of the funnel. This part presents a special difficulty in terms of the number and complexity of some elements such as the placement of the walkways and the brackets that support the searchlights platform. Next, with the assembly of the bridge, the work becomes more difficult with the placement of the walkways around it, which are more complex to glue than those of the funnel. These elements will prevent me from masking the area to paint the camouflage later, so I will have to paint the camo pattern very carefully with a brush. I also built the rangefinder, placed the mast and added other details based on the photo-etched set and other ones built by myself. On the most aft structure will be the catapult of the seaplane, a finely detailed PE piece achieved by Ka-Models, which I used in preference to the one in the Eduard's set. Likewise, the cranes and the Arado AR-196 were detailed. To make the searchlights, I discarded the ones from the Academy kit as they were not suitable and used the leftovers from Trumpeter's Bismarck kit, modifying them to resemble those belonging to the Graf Spee. Other parts that were discarded are the 37mm AA guns and the 20mm machine guns, replaced by leftovers from Trumpeter's Z-30 and Mirage's USS Ward respectively. Then I detailed them with Eduard's photo-etched parts and other leftovers, finally adding the Master's metal barrels.

Pintura
Painting
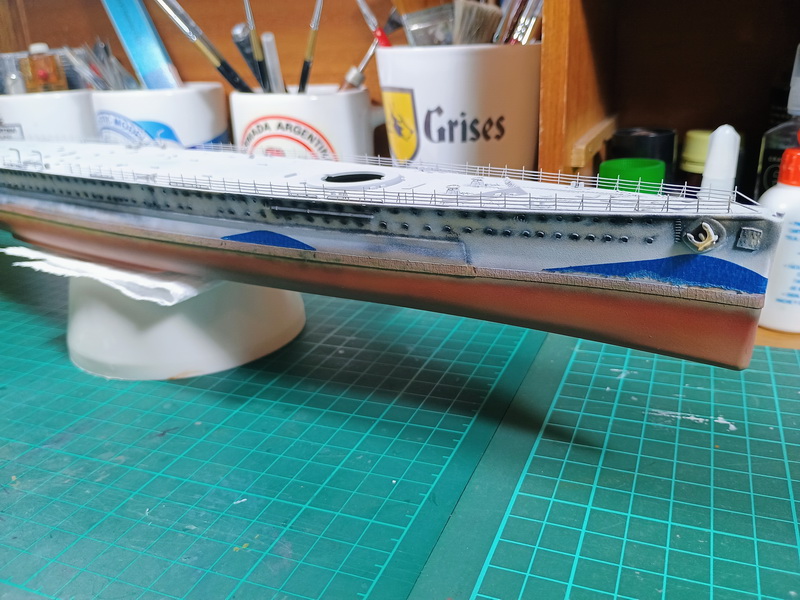
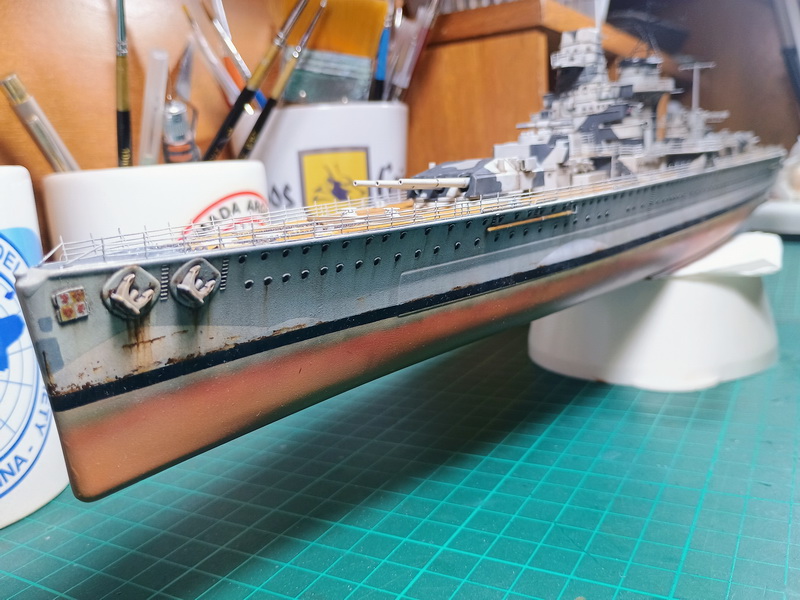
El esquema del camuflaje del DKM Graf Spee ha presentado a lo largo de los años algunas controversias respecto a los colores utilizados. De las tres teorías que he conocido, la primera de ellas sostenía que las manchas de color aplicado eran verdes, y así fue como pinté mi primer modelo de este buque. Más tarde tomé conocimiento que el buque podía haber sido camuflado en colores propios de la Royal Navy, esto es con manchones celestes, azules o verdes, para así simular ser un barco de aquella flota. En simultáneo con esta teoría supe que probablemente los colores hayan sido los utilizados por la Kriegsmarine dado que era más apropiado que contaran con los mismos a bordo. Entonces escogí esta última versión para pintar el modelo ya que me pareció la más lógica. No obstante ello, sin importar los colores utilizados, lo cierto es que al camuflar al buque lo que se buscó fue simular los esquemas de la Royal Navy y así generar confusión en los probables perseguidores.
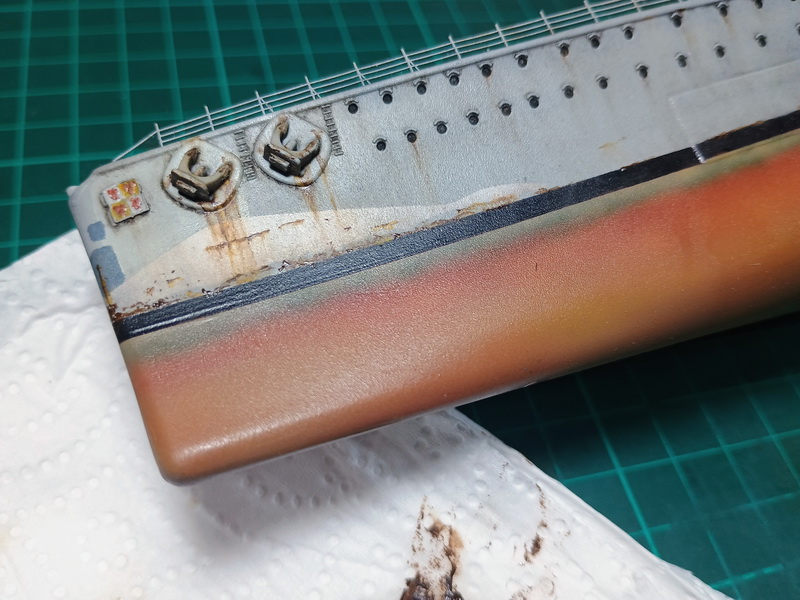
Escogidos los colores y luego de aplicar una mano de imprimación gris de El Ogro, lo que hice fue dar luces y sombras en tonos blancos y negro para luego pintar los colores bases del casco. Para la obra viva usé el rojo óxido de Komboloi y un gris medio para el resto del casco, completando las olas del camuflaje en blanco. Hacer el camuflaje de las superestructuras supuso un trabajo más delicado ya que sólo podía realizarlas a pincel debido a la dificultad para enmascarar tanto el puente como la chimenea por la gran cantidad de piezas delicadas en fotograbados que poseen y la posibilidad de arrancarlas con la cinta de enmascarar. En primer lugar di con aerografo un gris claro a toda la superestructura y para el camo utilicé el viejo set de colores acrílicos de la Kriegsmarine de Sicko, que me ha dado un buen resultado dándolo con pincel. Sólo las torres principales fueron pintadas totalmente con aerógrafo. Por último realicé los desgastes con óleos y ensamblé todas las piezas del modelo.
The camouflage scheme of the DKM Graf Spee has been the subject of some controversy over the years. Of the three theories I have heard, the first one claims that the painted patches were green, and that is how I painted my first model of this ship. Later I learned that the ship could have been camouflaged in Royal Navy colours, with light blue, blue or green, in order to simulate being a ship of that fleet. At the same time I learned that the colours were probably those used by the Kriegsmarine, since it was more logical to have these on board. So I chose this last version to paint the model since it seemed the most logical to me. Nevertheless, regardless of the colours used, the truth is that by camouflaging the ship what was sought was to simulate the schemes of the Royal Navy and thus generate confusion in the probable pursuers.
Once the colours were chosen and after applying a coat of grey primer from El Ogro, what I did was to apply highlights and shadows in black and white tones and then paint the base colours of the hull. For the lower hull I chose Komboloi's rust red and a medium grey for the upper hull, completing the waves of the camouflage in white. Doing the camouflage of the superstructures was a more delicate job as I could only do it with a brush due to the difficulty in masking both the bridge and the funnel due to the large number of delicate photo-etched parts they have and the possibility of tearing them off with the masking tape. First I airbrushed a light grey to the whole superstructure and for the camo I used the old Sicko Kriegsmarine acrylic colour set, which has given me good results when applied with a brush. Only the main turrets were fully painted with an airbrush. Finally I applied the weathering with oils and assembled all the parts of the model.